
What happens after you sign up
Nothing on AffiliateHost waits for a person to read a ticket. The moment your payment goes through, software creates your hosting account, and if you entered a domain at checkout it starts building that site too. Here is what you will see, in order.
1. You pay on Stripe's secure checkout
Checkout runs on Stripe. You enter your card there, not on our site, and Stripe confirms the payment. You are then sent to a "Setting up your account" page in your account area at affiliatehost.com/. It refreshes itself every few seconds while the account is created. This usually takes under a minute.
2. Your hosting account is created
Behind the scenes we create your control panel login with the name and email you gave Stripe. When it is ready, the welcome page tells you to check your email, and a welcome email arrives with a "Set your password" button. The link in it works for 24 hours. If you miss it, use "Email me a login link" on the login page instead; that sends a fresh link that works for 15 minutes.
3. Your first website, if you added a domain
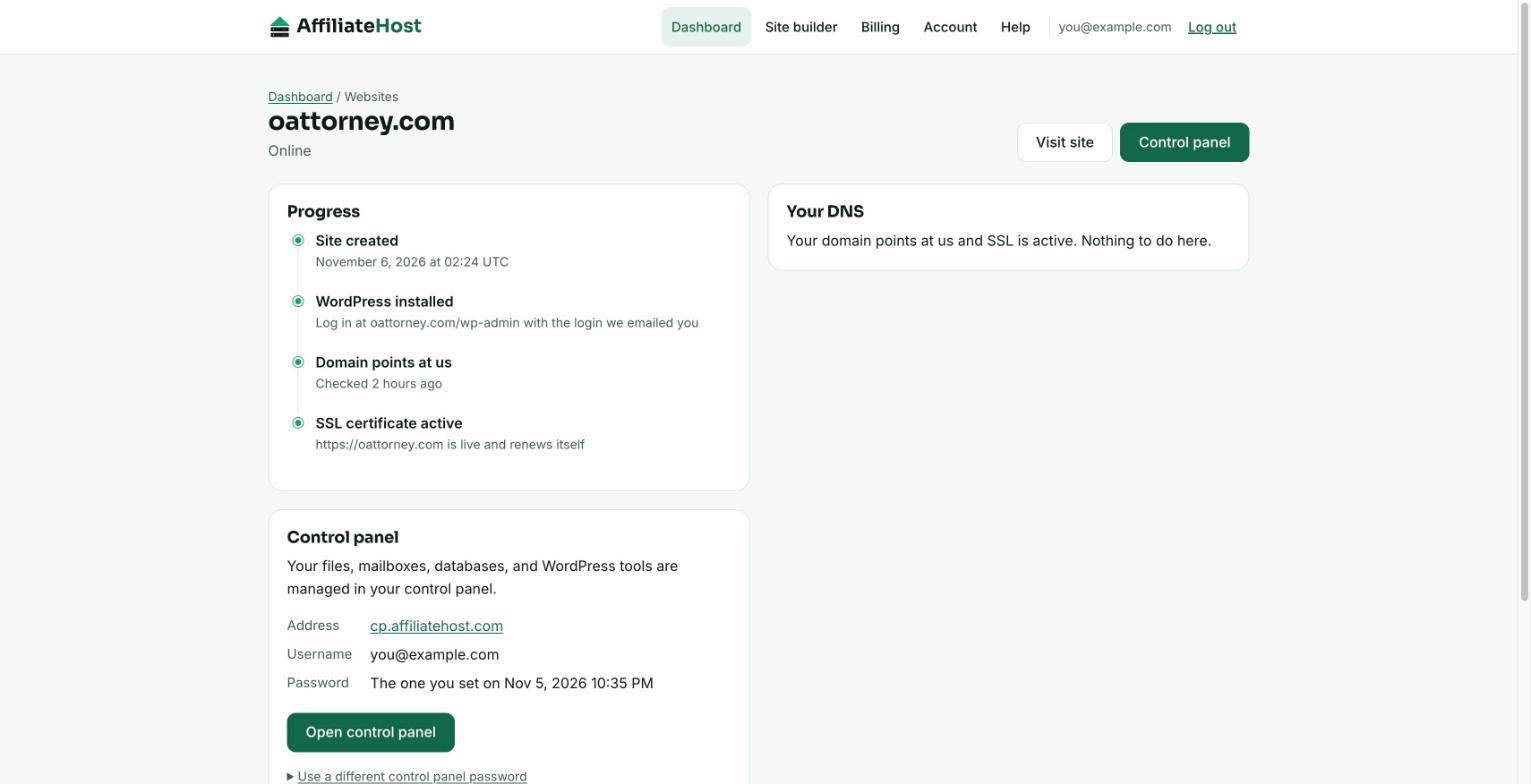
If you typed a domain at checkout, we start that site as soon as the account exists: a fresh WordPress install on its own hosting space. Your dashboard shows it with a "Setting up" label and a timeline of each step. You get a site ready email when WordPress is installed, with the exact nameservers or A record to use for your domain.
If you did not add a domain, that is fine. Your dashboard simply shows "No websites yet" and an "Add website" button. There is no deadline and no penalty for adding it later.
4. Point your domain at us
Your site exists on our platform before your domain points to it, so visitors keep seeing whatever the domain showed before. When you are ready, follow Pointing your domain to AffiliateHost. The site page in your account checks your DNS for you, every six hours at first, and turns green once the domain resolves to us. You can also press "Check DNS again" yourself.
5. SSL turns on by itself
Once DNS points at us, we request a free SSL certificate for the domain automatically. You get an email when the site is live on HTTPS. There is nothing to click and nothing to renew; see Your free SSL certificate for the details.
6. Log in to WordPress and publish
From your site page, "Open control panel" signs you straight into the control panel with one click. From there you can open the WordPress admin, create mailboxes, and manage files. The control panel also has its own Help Desk with step-by-step guides for every screen.
If something looks stuck
A site normally moves from "Setting up" to "Active" within a few minutes. If a step fails, the site page says "We're on it" and we are alerted automatically; you do not need to open a ticket. If you want to talk to us anyway, contact support with the domain name.
And if the whole thing is not for you, your first payment is covered by the 30-day money-back guarantee. Email us within 30 days for a full refund.
Was this helpful? If something here is unclear or out of date, tell us and we will fix it.
Related articles
- Your account area vs your control panel
- Adding another website
- Pointing your domain to AffiliateHost
Detailed control panel how-tos live in the Help Desk inside your control panel. Open it from your account area.